Tuesday, September 29, 2015

Kids rooms- with a learning curve


Designing your first kids room is exciting, and a bit intimidating. There is a plethora of adorable themes and prints, colors, and it can really make your head spin. Since you don't know your child's personality yet, it really relies on you! Do you want you baby boy to support your favorite sports team, love boats, or animals.

I guess its kind of like your wedding. I remember trying on slim dresses, big poofy dresses, mermaid style, etc. I had nautical themes, farm themes, ocean colors, fall colors. If I could, I think I could have planned a wedding for each season in a different setting.

As with my wedding, I finally settled on a theme/color scheme. I decided to do a jungle theme for my first baby boy. I love jungle animals and I had a lot of things that would go with it. It is that last statement that I realize is where I fail. Usually, every vision comes with a price tag and in order to save money I always look to how to incorporate what we already have. Which ends up leaving the overall design a little flat.

I came across this picture today.


 This was the room decoration for my first born. At the time, I LOVED it and thought there was some great cohesion with the things in the room, and in all fairness, there was. What isn't shown is the art piece with the African animals walking out of the painting and the wood carvings I got in Kenya. There was some cute stuff. But damn if this room isn't screaming BORING! The monotone of the walls, the lack of enthusiasm in the draperies. It feels sterile. A little paint could have made this a different room all together. 

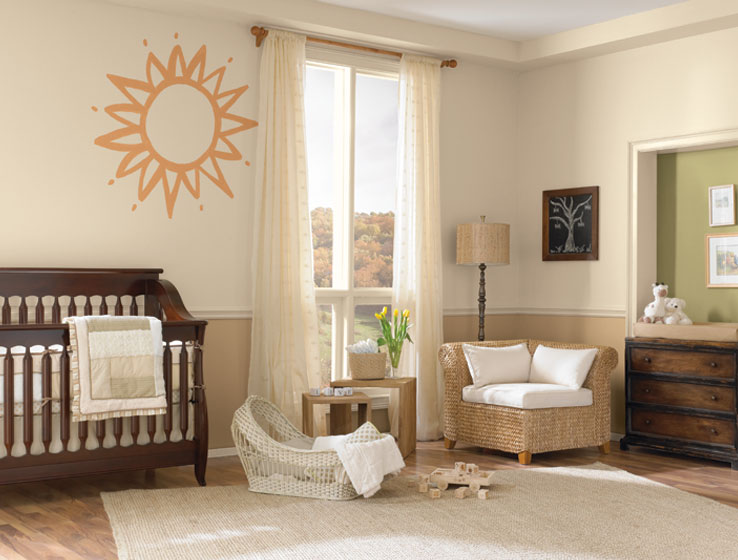
If we look at my next attempt at his room.


Seriously? Wall decals? Not even arranged with any creativity? I did like the orange closet, only because it was my son's favorite color at the time and he loved it.

But this room is the opposite of the first. The furniture and design items are limited at most. The color is an overstatement, especially with the oak trim, and the double curtains. There is a lack of a bedspread and honestly, not much cohesiveness other than sports theme sprawled all over.


As time went on, and my second son moved into the room, I tried to find a way to make it better. I was on a budget and figured the room would grow.


I will say, when I got the bunk bed in and got matching bed sets, it started to look better, though, I still never liked it. It wasn't thought out, and I didn't have the budget for it, so it seemed rushed and thrown together. I blame pregnancy on this one.

On my third kids room, I think I really started to learn. Here is my daughters room.


In true recycling fashion, I was able to keep the jungle theme and girly it up with a pink jungle bed set. It was the first time I went and found inspiration. I decided to take a risk, I painted the trim off white and did a half wall, mimicking the design from Sherwin Williams collection. I took all the colors from this:


Terrible quality photo, I'm sorry. It's the only one I can find from when it was her room. Once again, as my rooms get better, I wish my photography skills did, so I could really show off how good it looked.

After realizing it wasn't fair to give the single girl the bigger room, this room became the boys, and I got a clean slate to start over. I had to figure out, do I paint again, or do I try to fit their red, navy, and baby blue sports theme in here. First thing first, I knew I had to get rid of the green wall, it just didn't work.


The tan and off white did fit the sports theme. Especially when I was able to do the baseball wall. This was one of my original inspirations of the "sports themed room". But in the other room the boys were in, there really wasn't any wall space where this would work. I think it came out awesome here. The colors are SW China Doll for top, SW Dromedary Camel on bottom, the tan stitching is also Dromedary Camel and the red stitching is left over exterior door paint SW Salute. I used a kids paint brush from a water color paint set and just did it by hand. There were a few that came out a little wonky and I painted over them and redid it. I also traced the original half circles with a pencil before starting. Took me an hour or two and it really pops.

Here's the wall in progress:


To do the half wall, I measured along the wall and marked with a yellow crayon, then I laid painters tape just above my yellow marks and used a roller to roll on the tan. I made sure to hit the bottom of the tape and then pull the tape off still wet. I think I got really clean lines. The next stage we moved the beds in and got matching red end tables. The green floors stayed because I thought they gave the feel of a field.


For Christmas we gave the boys these cool skateboards and they fit in perfect with the colors and the theme of the room. I added a bookshelf and kept it the natural wood color to match the skateboards and here it is. I love it. Although the floors are green and fine, I do look forward to the day they have actual hardwood floors in here.


The garden walkway

It's funny how sometimes a small project can grow. When I thought about getting a beautiful arbor for the entrance to my garden, all I thought about was how much it was going to really pop. It would make the garden entrance look so beautiful and inviting. It would make the yard look more complete. It was a one day project, that was it.


It was perfect... but, it made that side of the yard look messy. There was a scraggly lawn attempting to grow around it. There was also a half attempt at a perennial bed that I had thrown a few random plants in. To me, it seemed weird to have a grand entryway with no walkway. After a week or two, I realized it was driving me nuts and something would have to be done. And like that, my one day project turned full summer project.

The first thing I needed was some inspiration. Its such an odd space. It's off to the side and in front of the driveway. My biggest problem was that I could envision where I wanted the walkway, just not what to do on the right side. The space is so big, I just could really picture doing a huge garden there. At the same time, I didn't really want lawn there, because then I'd have to mow it and go over whatever walkway I had to get to the other side to mow.


I started to mark out the walkway. You can see the odd space I have there on the right. Plus, it had been home to our picnic table. Not that we picnic there, but the kids play on there and have snacks there sometimes. I had to think about what could go under that and be low maintenance.


I pushed on. Next thing I knew, I had shoveled, hoed, and pulled out all the grass and weeds. I took a metal rake and I smoothed out the dirt the best I could and I cut and pulled about a million roots.


After many pinterest and google searches of "garden walkway". I finally decided that we really couldn't afford this new project I had in mind and that I was going to have to be thrifty. My first attempt was to find flat stones and lay them out. But, I quickly realized this would take me forever and it really wasn't giving the look I wanted.

I finally decided I would make fake cobblestones using the Quickcrete(R) walk maker. I read up and I thought it would give me the look I was looking for, but cheaper, and I could do it myself. Hahaha. I packed the kids up in the car, drove to Lowes and bought the mold and five 50lb bags of concrete. Looking back, that is hilarious.


While the kids were doing "rest time" I got out the wheel barrel, grabbed my hoe, a large measuring cup and mixed up the concrete. I bought the non-quick dry since it was $1.20 a bag. I mixed and mixed and laid all 6 bags (I had one bag of quick dry 50 lbs already at home). This is how far I got. Had I actually thought about this, and realized that 6 bags only covered the inside of the arbor, I may have quit. But I loved how it was looking. I even had all my kids put their hand prints on a mold.


I tried adding some colorful glass, and quickly realized it didn't look good, so I quit. And the project continued. 


I got a 5 hour, kid free window one day and made it this far. This was around 29 bags of concrete later. I had to work that night and I could barely hold anything. My arms were jelly and I quickly wished I'd rented a cement mixer. I was only about half done. :{

Knowing that I wouldn't be getting another 5 hour kid free window, I got antsy and wanted to see what it would look like done. I needed some motivation to get it done. So I laid some mulch on the sides and started to see what it would look like!! I also threw in a few more plants to the sad perennial bed.


Next we got a huge rain storm and pretty much all my mulch washed out. So I had to start again with the mulch. About 50 + bags of 50-80 lbs of concrete later (I later used 80 lb bags to help make it go faster), it was complete. 


I dumped black mulch on top of the concrete stones and using a large broom, filled in all the crevices. This made it look so much better. Any imperfections weren't showing and it helped make the concrete stones look like they were part of the landscape, instead of sticking up.


In the end I put another path to a little cast iron garden bench for the kids my neighbor gave us as a house warming present. I planted a hydrangea and some coral bells. I decided that a huge perennial bed it was :) It also took me the next couple big rain storms to see where I needed some help with stones so that I could prevent wash out.

Monday, September 21, 2015

Garden project

I am one of those people that never knows what I want for birthdays, Christmas, Mother's Day, etc. Or at least, I'm one of those people that thinks of things all the time and then the actual time comes and I draw a blank. Then I usually try really hard to think of something I'd like or need and end up just saying something I neither really want or need. Fortunately, this past Mother's Day was not the norm. For some amazing reason, I got inspiration and I knew EXACTLY what I wanted - a grape arbor.
I know, I know, I'm super exciting, aren't I? In all seriousness, I really did want this. I have these visions of growing grapes and making the kids fresh jam. Any person I told about my hope to grow grapes assumed it was for my own personal wine making venture, and though that sounds tempting, I think I'll leave wine making to the experts.
My first thought was that we would buy and arbor from a box store. So went on all the websites and nothing was really the look I wanted, or the price we could afford. All was not lost though, this research helped me narrow down that I was more interested in a pergola style arbor vs. well, any other style I saw.


We already had a pergola style arbor by the water well (above).


Actually, here is a better picture of it without all the greenery. Plus an added bonus of a family picture.

I was thinking something as simple and small as this would do. I started scouring craigslist. Maybe someone was getting rid of one. I struck out there too. There wasn't much, what there was I didn't like or again was way out of my price range.

My next route was to get the hubs to make one. Why not? He's handy. I went to the place you go for all inspiration ideas - pinterest of course. I found a few direction pages but in particular I found this one here. From there, I just had to keep reminding my husband that Mother's day was coming up and I think it was going to take a while to build. *hint hint*

Well, Mother's day weekend came. My husband went to buy lumber. Our first stop was the local lumber yard. Lets just say, the cost for just the cedar lumber was much more then buying one of the expensive ones we had looked at online. Off to the big box store it was. A reminder that going local is not always the most cost effective. Instead, we got all the pieces we needed for about $180. And that was the only cost.

It took a day, almost the entire day, the 95 degree, humid day of mother's day to built. But it is huge, it is cedar, it is gorgeous.

Ta Da!


Honestly, building the actual structure was easy. It was digging out the holes, leveling it and cementing it that took the most time and physical endurance. We have a lot of rocks down below that grass. Isn't it beautiful!?!

Stay tuned for part II, the walkway... the story of how one woman, took on too many bags of cement.

Friday, May 15, 2015

Spring at last!!!!

Spring is finally upon us and I find myself diving from one project into another. I really wish I had the mind to complete at least one of them before starting new, but what would be the fun in that!!

Mother's Day came and with it came a dream of mine- my very own grape arbor. It came out better than any store bought one, bigger, and cheaper!!


Best part- built by my wonderfully talented, and patient husband. Isn't it wonderful!?!?! All cedar, cemented in and ready for grapes. We used THIS as a guide to help us with materials. Be sure to shop around for lumber too, we had some outrageous quotes of way over $500 for all the materials. In the end the entire thing cost right around $180.

I've also decided to overhaul the screened in porch. I began the process of staining it today, as well as adding a color pop to the doors.


Now to finish planting the vegetable garden, to finish the expansion to the side perennial bed, and actually get some of my on going paint projects done. 

Tuesday, April 7, 2015

The Split - love it or hate it

Its so funny how split levels/ split entries/ raised ranches have such a nasty reputation. Yet they are everywhere!!! It makes sense why they became popular, as they do not require a full dug basement, they offer a lot of space, and from my research they are pretty cheap to construct. I will say, in our house hunting I NEVER WANTED A SPLIT! I know as we did some research to potentially sell our home, our realtor reminded us in comps that "that is a cape/colonial/etc, etc, you have a raised ranch - people don't want raised ranches".
All of this makes me feel a little sad for my poor house. I mean, I think that in the land of splits the curb appeal on ours is not so bad.


We have great land, a long, windy, paved driveway. Most importantly, we are in a great neighborhood. Location, location, location. When I first set out on my quest to find more on split level remodels, the one thing I saw over and over again was, "we didn't want a split, but it was in the perfect location." So when you have the perfect location, there has to be a way (cost effectively) to create the perfect house, right!?!

So lets look at the pros and cons of a split level, raised ranch, split entry. If you need to figure out what you actually have, I thought this was very comprehensive http://www.dakotacda.org/pdf/splitvisions.pdf

PRO's: Our house is spacious. We have 4 large bedrooms, 3 bathrooms (2 of which are large), and I love that we have two living rooms. We have a laundry room, so the piles upon piles of laundry my 3 kids create can hide from view. We have a beautiful 5 Bay window that lets in an incredible amount of light into our living room. We are also lucky that our basement level has really nice ceiling height (9ft), that I wish carried up to the main floor. We have a huge screened in porch attached in the back, which seems to be a pretty common add on that many splits have done in their early years. I also love our fireplace and wood stove, from my research I see this isn't always in all splits, but it is a great feature. Lastly, I like my laundry shoot :)

CON's:
INTERIOR:
BEDROOMS - All the bedrooms are together. In most splits the bedrooms are clustered to one side of the main floor. We are lucky enough to have one in the basement, but which kid do we send into the basement? Why I hate this? I hate sharing a wall with my kids. Right now it is okay cause they are little and many times I have to go into their rooms for nightmares etc. But, in the long term I know we do not want to be directly across from them in our bedrooms.

KITCHEN - It is small, dark, there is no counterspace. It is this tiny little room that does not align with the modern era of kitchens being the gathering space. The lack of counterspace is appauling, our first Christmas the kids and I needed to use the kitchen table as a floating island to do anything.

STORAGE - We are lucky to have a million closets in our house. Each bedroom has a closet, the upstairs hallway has 3 closets, and we have a closet as your enter from the garage. That said, there is no where to store stuff that is more appropriate for a basement or garage. Our garage fits both our cars, but barely, and with little room for storage. We have utilized under the deck, but it has meant every winter putting up tarps and struggling to keep them together through the rough New England winters. Not to mention it looks like hell.

BASEMENT - Its dark and its a basement. We have a living room, bedroom, laundry, and bath and although we have windows the laundry window is covered by the porch, the bathroom lacks a window and you just have the feeling of being in a basement. So 800 sq feet of our living space just has the basement feel. 

EXTERIOR:
ENTRY - There is no doubt, this is one of the most complained about aspect of any split. The entry looks last minute, or lacking in any design or style. Luckily ours has some great molding and a beautiful window that was easily spruced up with a little paint. But, it is still pushed back into the house leaving much to be desired.

ROOF LINE - It is boring and ugly and straight across. There is nothing drawing your attention away from the split or the recessed entryway.


So, with all that, what do you do about it? Well, if I had an extra $100K, I think I could feel confident to make any split something that I could love. But, sadly that is not my case.

The most common renovations I have found in my research focuses on the entryway. Adding a portico, or changing the roof line to draw your focus away from the fact that it is a split.

Here is my vision on our changed entry. I'd love to add a craftsman style portico and change the roof line over the living room. Plus the bonus of this is to add the garage and finish off the garage we currently have to add more space. This is an exterior I could definitely be happy with.

Photo credit: thisoldhouse.com

Interior-wise, the most common change is to take down walls where you can. Opening up the kitchen and the dining room and/or the kitchen/living space with a wall opening or half wall. Combining two small bedrooms to create one large master.

This is one area I am stuck. We have taken down the wall between the kitchen and the dining room. We have added a window to let in more light for the kitchen/dining and we are adding solar tubes to again increase the light in the kitchen.

The view of our new window from the kitchen

Our master bedroom is large, but I would maybe take the wall between the hall closet and our master bath out in order to increase the size of the master bath. But none of this solves the bedroom cluster dilemma. We are thinking of finishing the current garage and adding on like in the picture above, allowing us to move the kids bedrooms all downstairs and putting the office upstairs with a spare bedroom.

If we are able to do the exterior upgrades and finish the garage and make a new one, I think our house truly could be our dream house. Sadly, these next two phases put us well over the $100K in renovation costs. We are left to debate, is it worth it?


What are your reasons to love or hate your split?


Thursday, February 26, 2015

Office complete

In the beginning of this renovation my husband and I promised ourselves that we would tackle one project, one room at a time. This way we could focus our time, money, energy, and mess on one space. Sadly, that has become quite a joke as we usually have multiple projects going on in EVERY SINGLE ROOM in the house. It's because of this craziness, there is an amazing feeling when a room comes to completion.

On a side note, I hate to say completion, because I often rarely feel like EVERYTHING could possibly be done in a room. But, for the purposes of the immediate future, I'll say complete.

The office, is finally a room that can go on the completed list. Amazingly, it is the last room we have touched and actually the first room to be totally done. Sure, there are a few things that maybe could be moved, a shelf that could be painted. I have a curtain made, but not hung and honestly, I don't know if I will hang it.

Like all projects, after its done, I love it! I want to be in there all the time. I can't understand how I didn't do this 2 years ago, instead of having this messy, ugly, storage hub. So here it is:

I started with this:


If only we had a picture of the mess this room became.
It was the room everything without a home came to die.
We barely functioned as an office, because if I had to dig anything out of the closet, it stayed to rest on the desk. 


After removing the carpet, scraping the glue, painting the trim, changing the light, painting the walls, painting the floors, adding an area rug, and building a craft desk. 


HIS


Here are some quick iPhone shots, I will get the camera out, clean up and show you the goods later :) Isn't it such a cool room!?!


 HERS

Tuesday, January 13, 2015

Project office

Here's our mess :


I forgot to take a picture of the he original carpeted mess. 
Step one, carpet removal, glue scraping. 
Step two: trim


Now, trying to figure out the color scheme.


Here we have Sherwin Williams Antique Red, Dromedary camel, and Wool skein.
I think we're leaning toward wool skein (top left) for brightening. 

Saturday, January 10, 2015

Need some inspiration.

We're tearing apart the office to do the floors. The office is never quite utilized right, its basically our downstairs junk room.

So, I need some inspiration to put it back together better.


I'm thinking even when our big dreams of finishing the garage happen, this is going to be the "music" room for a while. At least until the dream garage gets built - so you can see what I mean by a while.

This is one of the prominent pieces in the room, the other, a burgundy and black poster of my hubs old band. Chip away!!